As summer temperatures fade and autumn arrives, pool owners in colder climates face an important task: preparing their above-ground pool for winter.
Freezing temperatures can damage pool liners, plumbing, pumps, and filters if left unprotected.
Winterizing your pool is a multi-step process that, when done correctly, preserves your equipment and makes spring reopening much simpler.
Why Winterizing Matters
Winterizing your above-ground pool prevents costly damage caused by freezing water.
When water freezes, it expands, which can crack plumbing lines, damage pump housings, and tear pool liners.
Additionally, untreated pool water left stagnant through winter becomes a breeding ground for algae and bacteria.
A properly winterized pool stays clean and balanced, reducing the workload when warm weather returns.
Failing to winterize can lead to expensive repairs. Cracked pipes, damaged filter components, and algae stains are common consequences of neglecting this seasonal maintenance. Taking a few hours to close your pool correctly saves both time and money in the long run.
When to Begin Winterization
Timing matters when closing your above-ground pool.
Start the process when water temperatures consistently drop below 65 degrees Fahrenheit.
If you winterize too early, warm weather can cause chemical imbalances and algae growth.
If you wait too long, a hard freeze may damage equipment before you have time to protect it.
Plan to complete the entire process over one to two weeks, leaving two to three days between chemical treatments and covering the pool.
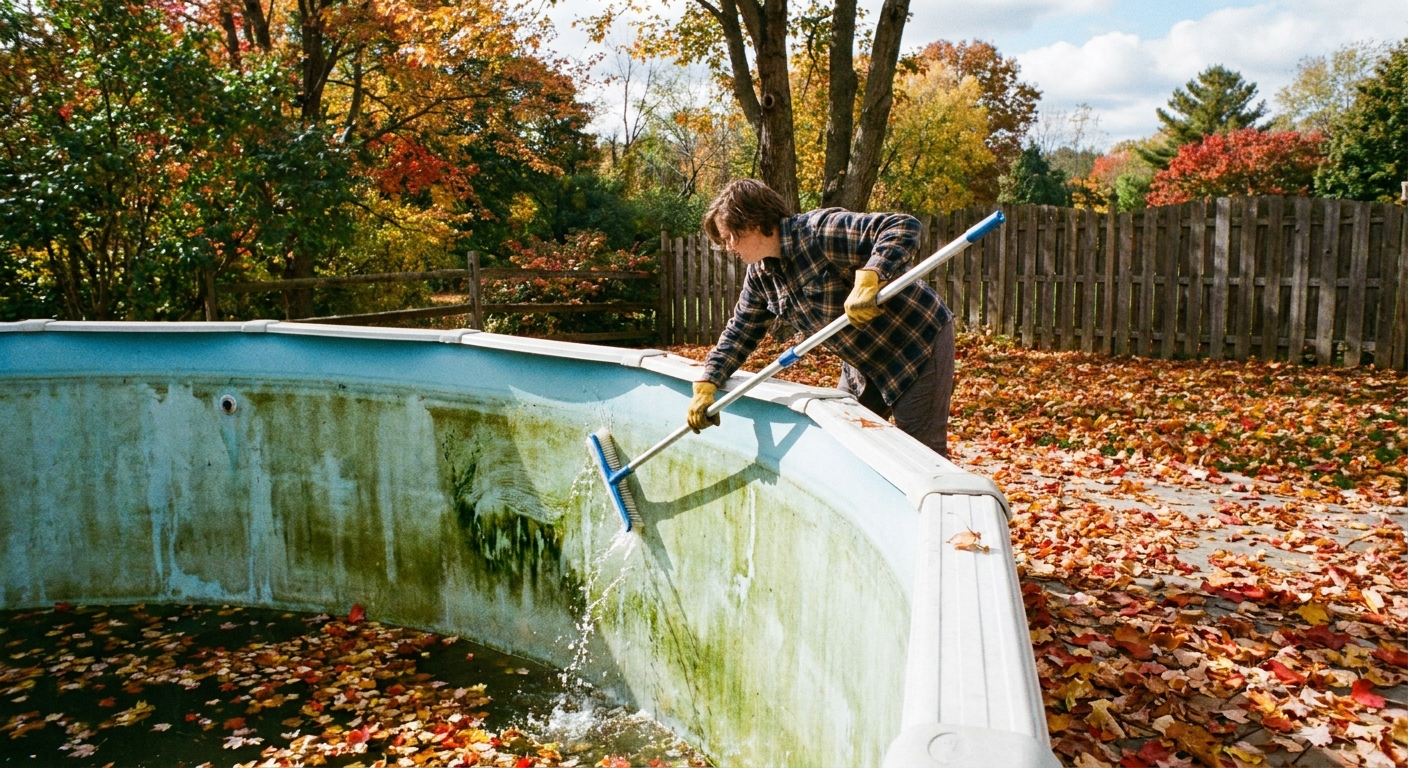
Step 1: Deep Clean the Pool
Begin by thoroughly cleaning the pool.
Brush all interior surfaces, skim debris from the surface, and vacuum the floor. Remove leaves, dirt, and any contaminants that have accumulated.
A clean pool ensures that winter chemicals work effectively and prevents organic matter from breaking down and causing stains or odors.
While cleaning, inspect the pool liner for any tears or damage.
Repair any issues now rather than discovering them in spring. After cleaning, empty and remove the skimmer basket. Also remove ladders, handrails, and any other removable accessories.
Rinse these items and store them indoors to prevent weather damage.
Step 2: Test and Balance the Water Chemistry
Balanced water is essential for protecting your pool during winter. Use a reliable test kit to measure pH, alkalinity, and calcium hardness. Aim for these target ranges:
- pH: 7.4 to 7.6
- Total alkalinity: 100 to 150 ppm
- Calcium hardness: 175 to 225 ppm
- Chlorine: 1 to 3 ppm
If any levels fall outside these ranges, add the appropriate balancing chemicals. Well-balanced water prevents corrosion of metal components and scale buildup on the liner.
Step 3: Add Winterizing Chemicals
Once the water is balanced, apply winterizing chemicals. Start by shocking the pool with a chlorine-based or non-chlorine shock to eliminate bacteria and algae. Run the filter overnight to circulate the shock throughout the water.
After shocking, add a winter algaecide to prevent algae growth during the cold months. Follow the manufacturer dosage instructions based on your pool volume. Allow several hours between adding shock and algaecide, as chlorine can interfere with the algaecide effectiveness.
Some pool owners also add a stain preventive, especially if their water contains metals or if the winter season is particularly long. These chemicals help keep the pool surfaces clean while it sits unused.
Step 4: Winterize the Pump, Filter, and Plumbing
Protecting your pool equipment from freezing is critical. Any water left inside the pump, filter, or hoses will expand when frozen and cause cracks or breaks. Begin by disconnecting and draining all hoses. Remove drain plugs from the pump and filter housing.
For sand filters, set the multiport valve to the winter position and remove the drain plug and sight glass.
For cartridge filters, remove the cartridge, clean it, and store it indoors.
After draining, store the drain plugs in the pump basket so they remain easy to find in spring.
Remove return jet fittings and insert rubber expansion plugs into the openings.
Install a skimmer cover or skimmer dam to protect the skimmer from ice damage.
If your above-ground pool has fixed plumbing, use a shop vacuum or air compressor to blow out the lines and remove remaining water. This step prevents trapped water from freezing and cracking buried pipes.
Step 5: Lower the Water Level
Reduce the pool water level to about four to six inches below the skimmer opening. This protects the skimmer and return jets from ice damage while keeping enough water in the pool to support the cover and maintain structural integrity.
Avoid draining too much water. The weight of water inside the pool helps hold the walls in place against external pressure from snow and ice. Draining too low can cause the pool walls to buckle or the liner to shift.
Step 6: Install an Air Pillow and Winter Cover
Place an inflatable air pillow in the center of the pool. Inflate it to about 50 percent capacity.
The pillow creates a slight tent under the cover, which helps distribute the weight of snow and rain toward the edges.
This reduces stress on the pool walls and prevents ice from pressing directly on the liner.
Secure the winter cover over the pool.
Use a cable and winch system or cover clips to hold it tightly in place. The cover should be taut without sagging.
Avoid using concrete blocks or bricks, as they can tear the cover.
Instead, use water bags or perimeter weights designed for pool covers.
After the cover is installed, check it periodically throughout winter. Remove accumulated snow and debris to prevent excess weight from damaging the cover or pulling it into the pool.
For those living in regions with harsh winters, taking the time to properly winterize above ground pool equipment ensures that your investment remains protected. A thorough closing routine prevents freeze damage, reduces spring cleanup, and extends the life of your pool and its components.
Final Thoughts
Winterizing your above-ground pool is a straightforward but essential process.
By cleaning the pool, balancing the water, applying the right chemicals, and protecting the equipment, you set yourself up for an easy and enjoyable pool opening in spring.
Investing a few hours now saves you from costly repairs and unnecessary headaches later.
Follow these steps each season, and your above-ground pool will remain in excellent condition for years to come.